Homemade Pizza Dough Recipe

Ingredients for homemade pizza dough
Title: Kneading a Masterpiece: How to Craft the Perfect Homemade Pizza Dough
Anatomy of a Pizza Wizard
So, you’ve decided to take the plunge, smother yourself in flour, and dive headfirst into the magical world of pizza wizardry. You have embarked on a noble quest, my friend; one that demands time, patience, and an abundant amount of elbow grease. This isn’t just about making a pizza, you see; it’s about creating a dough-licious work of art. Here, you don’t just bake – you perform a sort of culinary ballet, your kitchen space transforming into a stage. So, grab your apron, put on your chef’s hat, and let’s dish the dough on creating a perfect crust for your homemade pizza.
The Humble Beginnings
Forging homemade pizza crust starts with an uncomplicated array of ingredients. But don’t let their simplicity fool you. Each is a parcel of potent enchantment that, when combined, ushers forth a mouthwatering masterpiece. The stars of this show will be:
1. Flour (4 cups): Obvious, yes, but not so fast! The type of flour you use is as crucial as the horse you pick for the Kentucky Derby. A high-protein bread flour is your fastest runner here, known for baking up sturdy yet airy and chewy deliberations.
2. Warm water (1 1/2 cups): Too hot and you’ll murder the yeast, too cold and they’ll slow dance instead of boogie. Aim for a nice tepid bath, about 110°F (43°C), right where the yeast loves to bust out their happy dance.
3. Dry yeast (2 1/4 teaspoons): This secret elven dust is the wizard’s wand of your dough. This stuff breathes life into your dough, making it rise and flaunt its bubbly attitude.
4.
“It has, moreover, a pleasant bitter flavour derived from the dark husks, which, if they were mixed in their natural condition with the dough, would impart a twang that would be exceedingly unpalatable”
~
Waller Ashe and E. V. Wyatt-Edgell, The Story of the Zulu Campaign
Olive oil (2 tablespoons): To lubricate the process and nimble up that dough, in comes the knight in shining armor – olive oil. It lends a touch of richness and keeps the dough limber.
5. Salt (2 teaspoons): Like Sinatra’s jazz to your ears, salt livens up the dull and turns meh into melody. It intrigues, it excites, and it sparks joy in the dough.
6. Sugar (1 teaspoon): Not just for sweetening your tea, sugar acts as yeast grub, helping them grow, multiply, and get their groove on in the dough.
The Dance of the Ingredients
Now, each of these elements, much like a shy wallflower at a school dance, needs to be coaxed into creating the disco we know as pizza dough. They don’t just magically merge – they blend in a choreographed dance set in the whirl of your magical mixing bowl.
First, you invite sugar and yeast to warm water’s party. Once they’re good and cozy (about five minutes), they’ll froth heartily, and that’s when flour and salt bashfully join the ball. As the mixer starts its hum, the dough starts to take form. Just when they all seem to be having a good time, enter the smooth operator, olive oil, to loosen things up a bit.
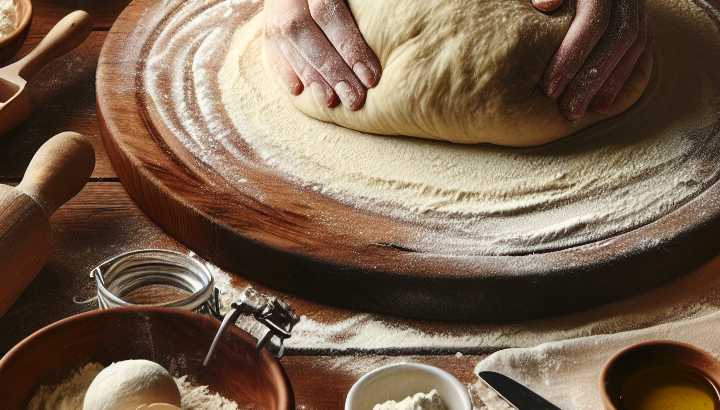
Finally, the electric mixer is swapped for your hands. It’s time to let your inner sculptor stretch and knead that dough into a smooth, elastic symphony. Exercise those biceps but remember, Rome wasn’t built in a day, nor is pizza dough kneaded in a jiffy. Give it the love and time it deserves!
There you have it – with a sprinkle of patience, a dash of humor, and a substantial shot of enthusiasm, you can transform everyday elements into a gourmet experience. Crafting homemade pizza dough isn’t a chore; it’s an intimate tango with timeless culinary magic. Now, please excuse me while I whip up my dough for tonight’s performance!

Steps for preparing pizza dough
Title: A Saucy Adventure: Your Heroic Journey to Perfect Pizza Dough
Welcome, aspiring dough-whisperers! Step away from the frozen pizza aisle and join us on a magical journey destined for deliciousness. This tantalizing trek’s destination? The realm of perfect, homemade pizza dough. Grab your flour and fasten your oven mitts, folks – it’s time to create some crust.
Step 1: Mise-en-Pizza-Place
So, let’s start with our dynamic duo of ingredients: flour and yeast – Batman and Robin of the pizza world. You’re also enlisting salt, sugar, and water: the trusty sidekicks. And the phantom element, invisible but invaluable? Patience, dear pizza pals, patience. Stand tall in your kitchen, shoulders back, oven mitts on, and declare with me: I will knead no dough before its time!
Step 2: Your Yeasty Beasties Unleashed
Get your yeast a-bubblin’! Combine 2¼ teaspoons of yeast with 1⅓ cup water (warmer than a summer’s noon, but certainly not hot enough to cook that adorable tiny fungus). Add a pinch of sugar to sweet-talk your yeast into action. Stir gently, then let it sit. You’re about to witness a supernatural resurrection akin to a baking soda volcano, but slower and less dramatic. Your yeast will awaken, hissing like miniature serpents and foaming like a rabid beast. Fear not; they’re friendly beasts.
Step 3: Alchemic Flour Fusion
In a separate vessel (basic kitchen bowl will serve you well), mix 3½ cups of flour with 2 tablespoons of salt. The salty sea meets the sandy beach. Fun fact: the flour could be all-purpose, but bread flour embraces the yeast like a long-lost friend. It’s reunion time!
Step 4: Marrying the Mixes
Add your yeast mix to the flour party, stirring until they’re all hanging out together in a shaggy, sticky mass. Don’t shy away from this dough-lamity; it’s a necessary stage of the pizza’s life cycle. It’s like the awkward teen phase for your pizza dough.
Step 5: Knead for Glory
Time to take off the oven mitts and get personal. Flour your hands and surface. It’s kneading time! Now, treat the dough like you would your nagging cousin at a family gathering: push it away with the heel of your hand, then fold it back towards yourself. Rotate the dough a quarter turn and repeat the dance.
“All being ready, the doughty queen regent set sail from the coast of Hizen, in Japan, in the tenth month A.D. 202, and beached the fleet safely on the coast of Shinra”
~ William Elliot Griffis, Corea
A solid 8-10 minutes of this tough love will reward you with a dough as smooth as a Barry White song.
Step 6: Rise and Shine
The time of patience has come (again). Rub your dough-kid with a drizzle of olive oil, then tuck it into a clean bowl covered with a warm cloth. Let it rest. Let it rise. Let it dream of becoming the best pizza dough it can be. A nap of about an hour or two will do. Expect it to inflate like a proud balloon.
Step 7: Fight or Flight
…or as we like to say, punch and divide. Release your stress onto the puffed up dough. Relieve it from its airiness. Once it’s regained its humility, divide it into portions suited to your hunger levels and pizza size preference.
Step 8: Shape Up, Dough
Roll out your dough with authority or use your hands for rustic charm. It can be as thin as a whisper or fluffy like a cloud. Remember, beauty lies in the imperfections.
Voila! You’ve done it! You now hold a canvas ready for sauce, cheese, and a splash of creative toppings.
So, take a cue from this pizza dough journey. Evolve. Rise after being punched down. Adapt to the heat. And in the end, you’ll be topped with goodness and devoured with gusto. Now there’s a saucy slice of wisdom from a humble pizza dough.
Source: Steps For Preparing Pizza Dough

Resting and baking pizza dough
Title: A Night in with Pizza Dough: The Saga of Rest and Rise
We all know them – those days when the world just seems a little bit sharper at the edges, and the lure of the couch is so strong, you’re convinced there is some hidden magnet inside. On such days, the kitchen is the last place you want to visit, unless it’s for a rendezvous with your good friend, the refrigerator. But what if I told you a magical transformation could occur on your kitchen counter– an exciting epic drama involving flour, water, yeast, and time? Come, pull up a chair and lend me your ears, as we unravel the celestial art of resting and baking pizza dough.
On that thriller of an evening when you decide to don your apron and embark on your pizza dough journey, remember this – the heart of a perfect pizza is its crust. And the secret? Oh, the secret is Patience, young Padawan. Who knew baking and philosophy could tie the knot, right?
Let’s get the party started! Mix that flour, yeast, water, and salt, toss in a glug of olive oil for good measure. Knead until your biceps complain, I didn’t sign up for a workout session! Time for our dough baby to take a nap now. Cover the dough with a damp cloth or plastic wrap, a cozy cradle for our rising star. Now, you could also tuck it into the refrigerator for a cold sleep, and the contrast of the winter chill and the oven’s raging heat will make it a pizza dough of Ice and Fire.
Phase two of the dough transformation saga is poised, ‘the rise.’ All that kneading has set a stage for our yeast warriors. They are now gobbling up the sugars, belching out alcohol and carbon dioxide. This resting phase of fermentation oftentimes is symbolically referred to as letting the dough catch its breath. Yep, you heard right. Apparently, dough breathes. Who knew bread-making could turn you into a dough-whisperer?
Don’t rush this step. Your dough needs to rest and rise like a perfectly timed comedic punchline. It needs time, about 1-2 hours at the least for a warm rest and up to 24 hours for a cold one. This is where the humor comes in, right? Waiting for pizza dough to rise is like watching paint dry or grass grow, minus the snoring.
“I was down there one day in housecleaning time helping Leslie a bit, and I was frying doughnuts”
~ Lucy Maud Montgomery, Dreams
The reward, however, is a pizza crust that delivers the perfect crackle and crumble, with a soft chew that sings an Italian aria to your taste buds.
Rise and shine, baby! Your dough has risen like the aspirations of every underdog protagonist ever. Next comes the shaping – or as I like to call it, the stress therapy. Flatten it gently, using the heels of your palms. No need to toss it like an overenthusiastic Italian chef. We’re not in a pizza parlor, after all. We’re in your kitchen. Where there are probably breakable things.
Hey! Look at that plump, delightful dough circle, all ready to meet its destiny in the oven. Time to accessorize the pizza with your favorite gown of tomato sauce, cheese, and an assortment of toppings. Slide it onto a hot pizza baking stone, watch it bake in the heat of your oven.
And when the cheese bubbles like an enchanting golden pond and the heavenly aroma has you doing the cha-cha, it’s time to meet your masterpiece. Hear the symphony of the crackling crust, taste the plucky, sweet notes of perfectly baked pizza dough. Remember, it’s all because you gave our humble pizza dough the time to rest, rise, and transform.
So, there you have it, folks. The dough has spoken, the pizza is eaten, and the lesson is learned – sometimes, a little patience (and yeast) can truly transform the everyday into the unforgettable. Now go forth and bake!